
Click on the image for a larger view.
Click here for a super detailed view.
Click on the image for a larger view.
Click here for a super detailed view.
| Main Page and Introduction | Head Button Construction |
| Head Construction | Jet Construction |
| Body Construction | Final Assembly and Operation |
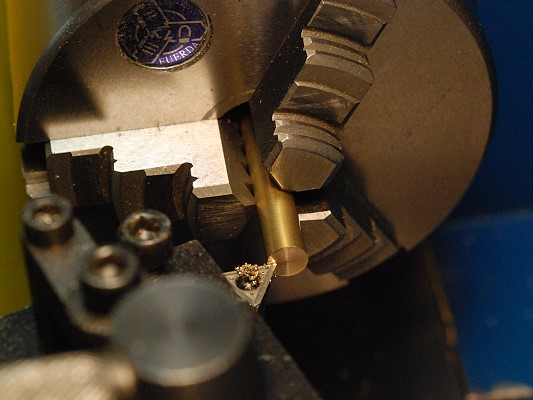
| Face the End of a Piece of 1/4" Brass: To make the head button start with a piece of 1/4" round brass stock about 1 1/2" long. Put the piece in the chuck and then face the end, as shown in the picture at right. |
|
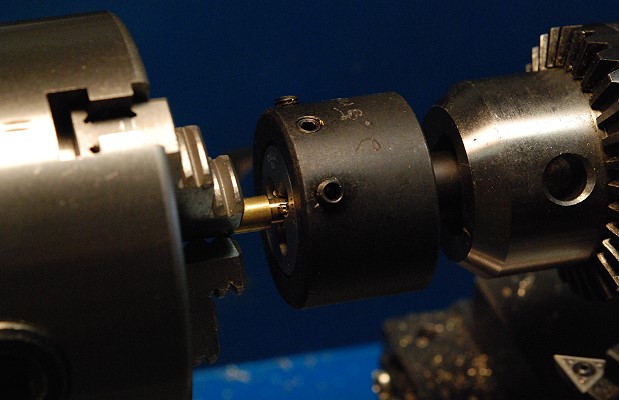
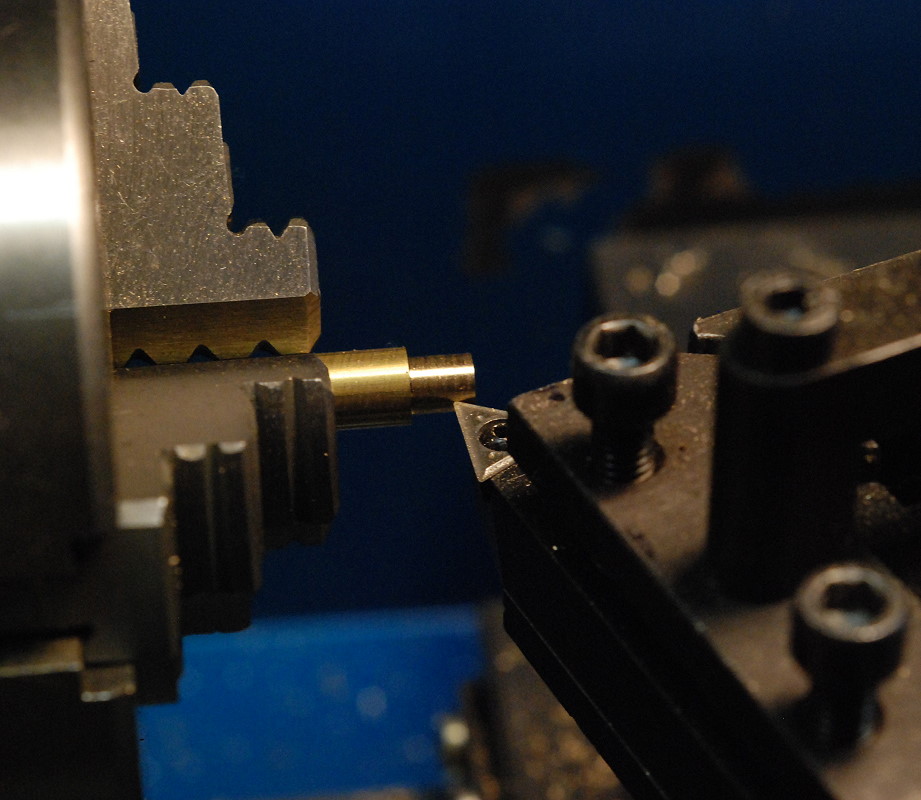
| Turning the Side of the Rod: Turn the side of the rod down to a diameter of about 0.180" for a distance of 3/16" as shown in the photo. |
|
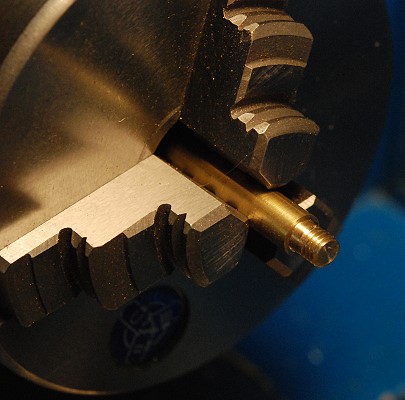
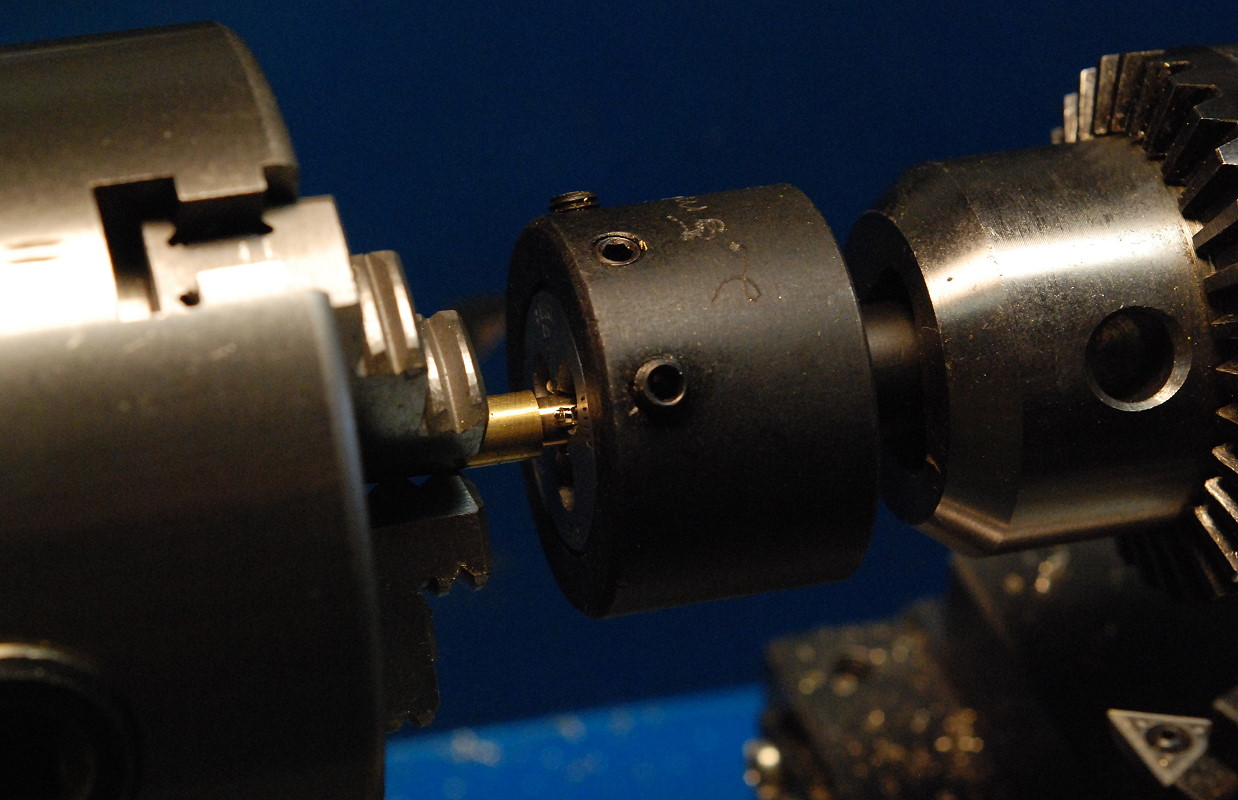
| Threading the Rod: After the side is turned, use a 10-32 die to thread the end of the rod. I use a die holder that fits in the tail stock chuck of my lathe. This is one way of making sure that the threads are cut square. Be sure to turn the lathe chuck by hand to maintain better control and to avoid trying to thread too far. (It is OK to put the lathe in reverse and use the lathe motor to remove the die.) Also, don't lock the tail stock down when threading in this manner. It should float free so that it can move with the chuck and die. |
|
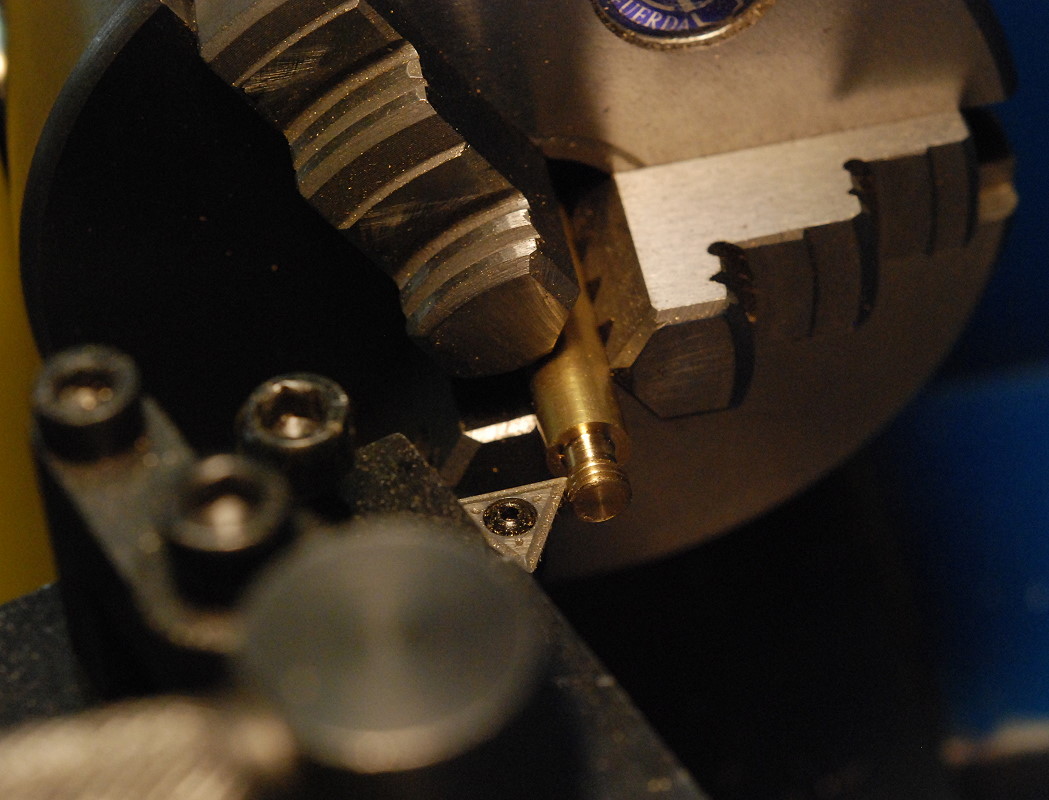
| Finished Threads: In this picture the end has now been threaded. Note that the threads do not cover the entire turned portion of the rod. An unthreaded portion remains. This portion must be turned down to allow the button to thread into the head. See the next step. |
|
| Turning the Neck: A neck is turned into the end of the rod by bringing the cutter up to the left edge of the unthreaded potion. The cutter is brought into the work a few thousandths and then moved to the right for 0.100" to cut a neck into the piece. Repeat the process until the neck diameter is about 0.150". Try threading the head onto the button to make sure you have finished this end of the button properly. (The unturned portion of the button must butt tightly up against the head so that there are no leaks.) |
|
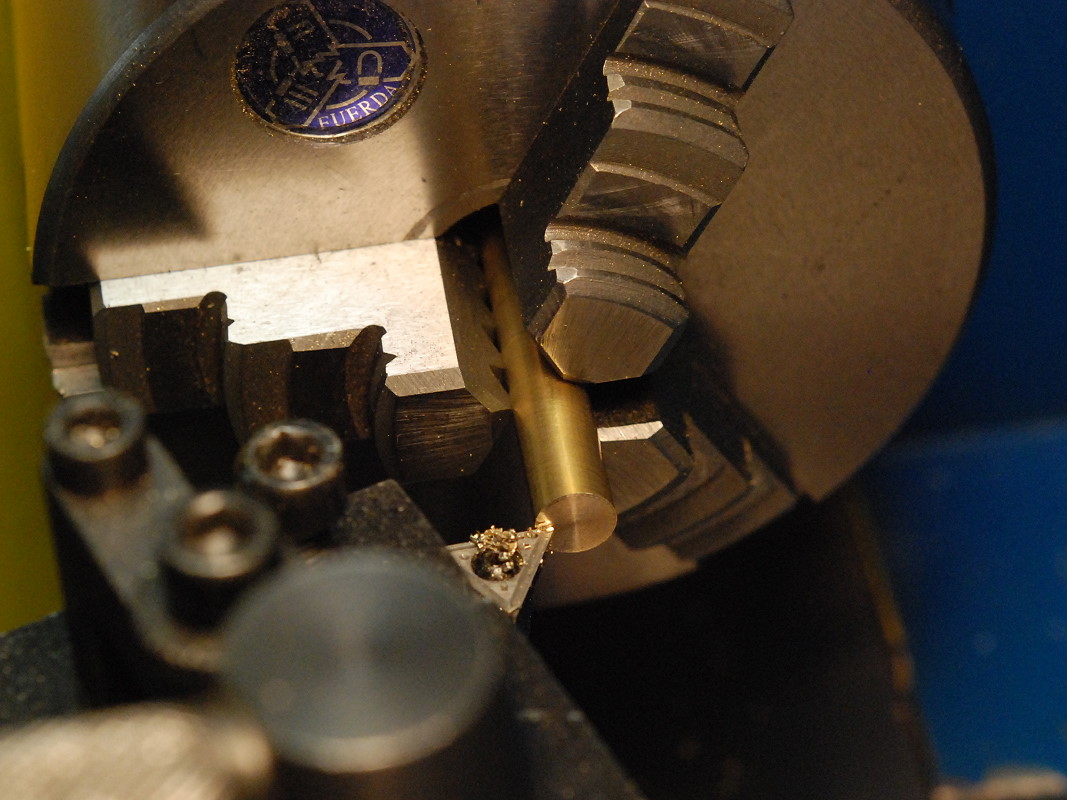
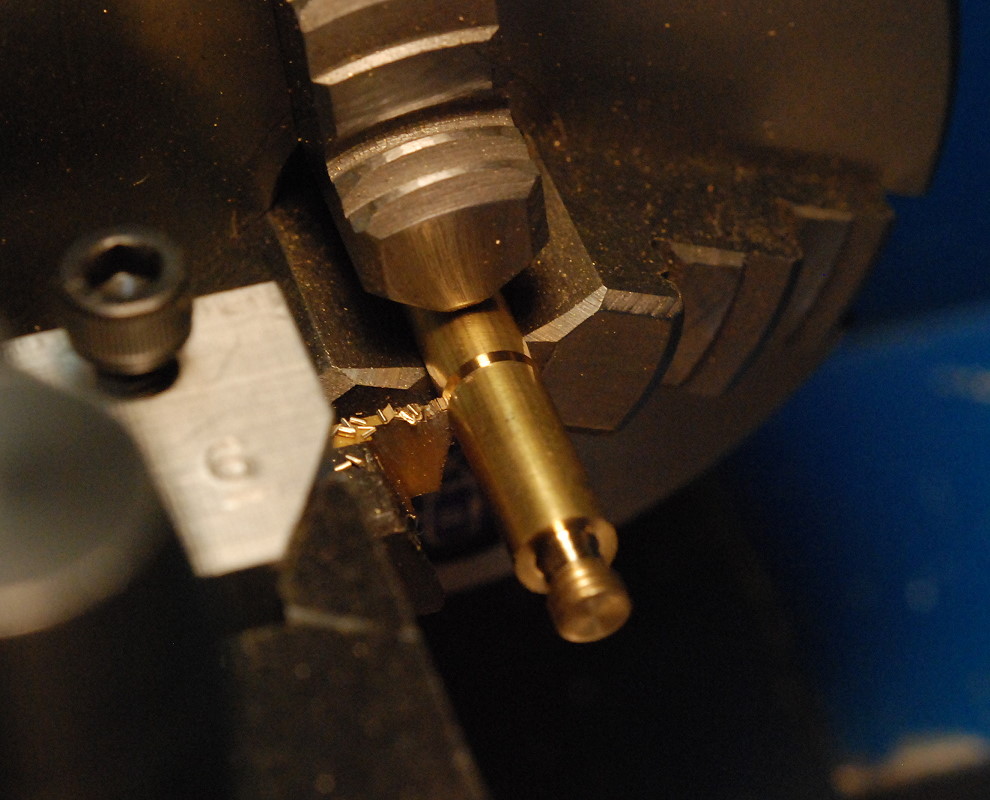
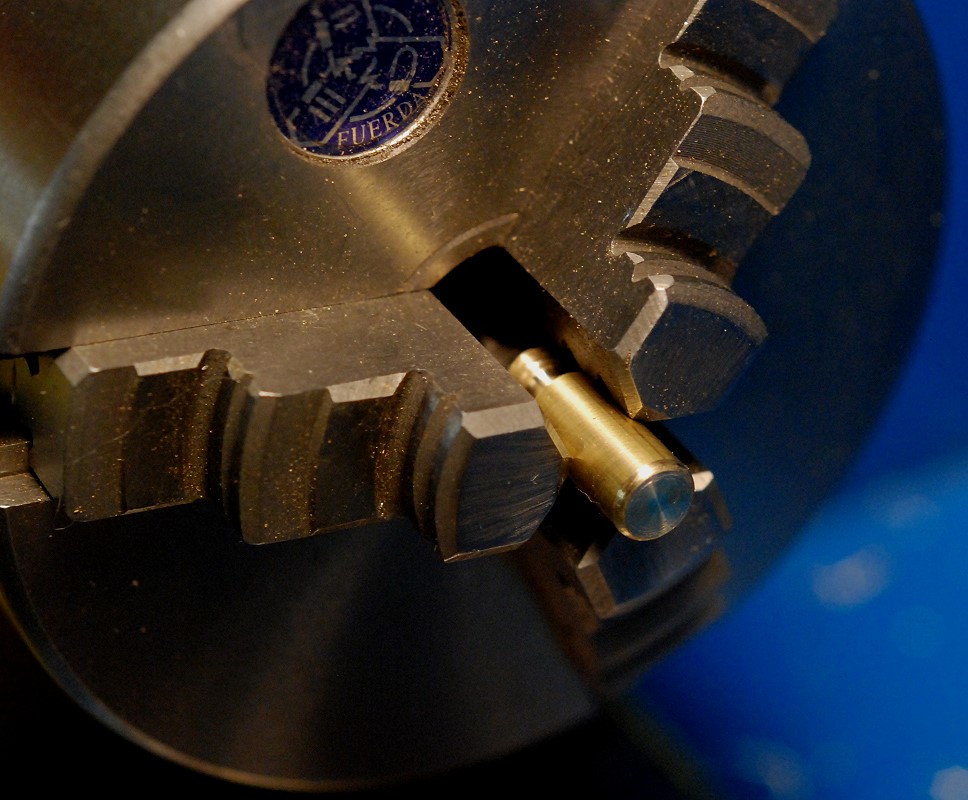
| Cutting off the Button: Cut the button off of the rest of the stock so that the unturned portion of the button is slightly more than 1/2" long. You can use a cutoff tool in the lathe as shown in the photo or you can use a hacksaw to cut the button off. |
|
| Chamfering the End of the Button: Remount the button in the lathe chuck and face the end until the unturned portion of the button is 1/2" long. (This is not a critical dimension.) After facing the end, use a file while rotating the button to chamfer the end of the button to remove the sharp edge and obtain a smooth, clean look. |
|
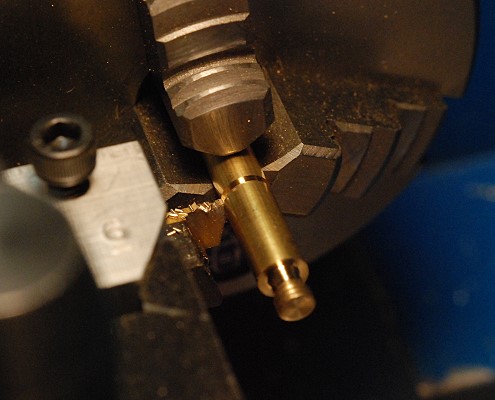
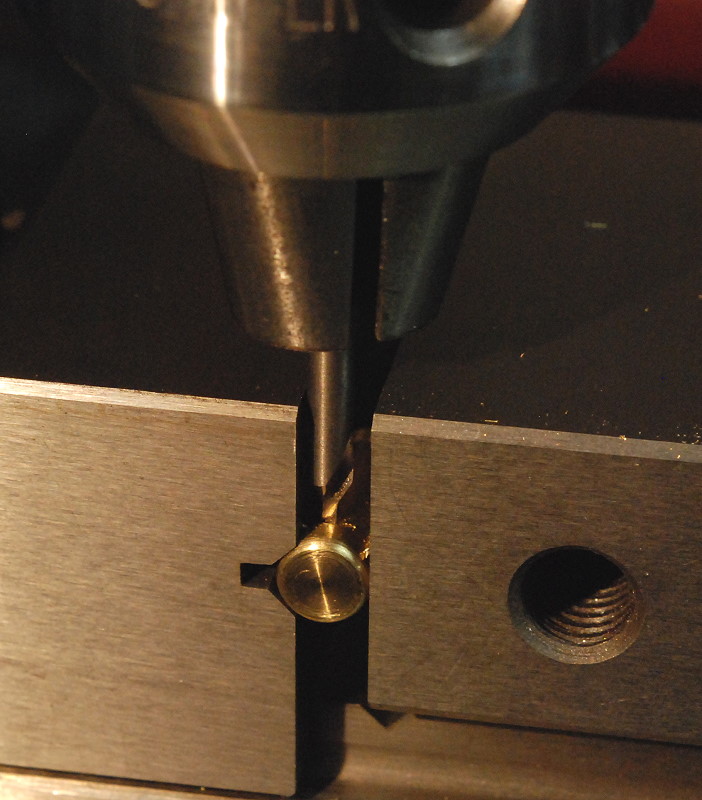
| Center Drilling the Button: The last step in making the button is to drill a hole through the button 1/8" from the end of the button and 1/8" in from the side of the button. Use a center drill first to drill a pilot hole in the button, as shown in the picture. |
|
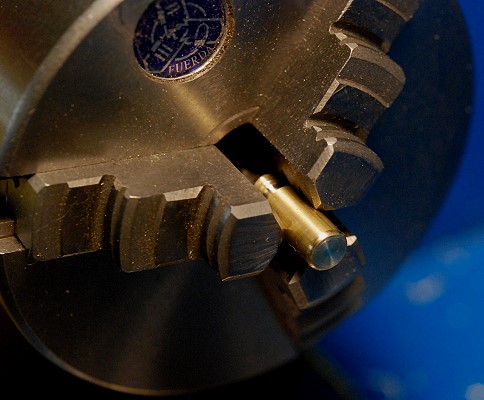
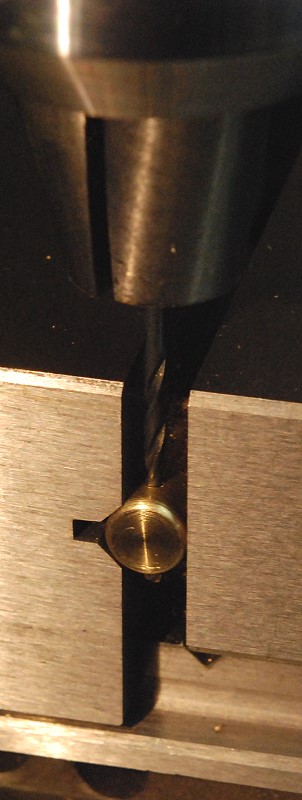
| Drilling the Button: After using a center drill to drill a pilot hole, drill a 1/16" hole all the way through the button. |
|
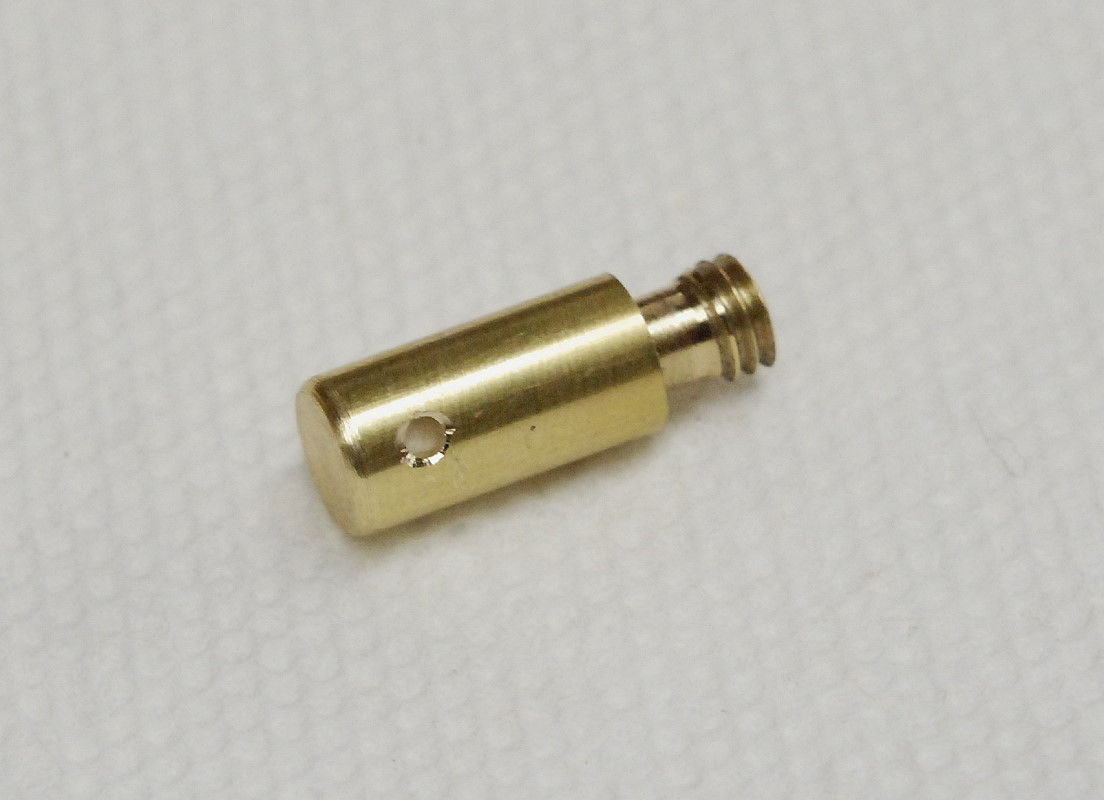
| Finished Button: After drilling the 1/16" hole, use a 1/4" drill turned by hand to gently chamfer both ends of the hole. This picture shows the completed head button. The threads on the right screw into the head, and the hole on the left is used to attach the button to a ball bearing fishing spinner with a short piece of wire. Notice how the chamfering on the left produces a smooth, rounded edge. |
|
©Copyright Statement:
All images, designs, and materials on these web pages are the property of
Gregory P. Latta and are ©2008 by Gregory P. Latta. You may use them for
personal purposes and for educational purposes, but any commercial or other use
is strictly prohibited unless written permission is obtained from the author.
Disclaimer:
Opinions expressed are those of the author or the quoted source. The author is
not an employee of or agent for any of the vendors referenced in the text and
does not sell or represent any of the products discussed. Vendors may provide
products for review purposes and may provide sponsored support through
advertising or links. No information provided herein represents professional
advice or best practices. All information is provided to help the reader gain a
better understanding of the tools and techniques described. Considerable care
has been exercised to provide accurate and timely information. However the
author cannot be responsible for information which is incorrect or out of date.
Power tools and shop practices can be dangerous if used carelessly or
improperly - always take proper safety precautions such as wearing protective
eyewear and appropriate clothing. All practices, procedures, modifications and
product recommendations described herein are to be used at the discretion and
risk of the reader.
 Back
to Dr. Greg Latta's Model Engineering and Mechanical Engineering
Pages
Back
to Dr. Greg Latta's Model Engineering and Mechanical Engineering
Pages
Back to Greg Latta on the World Wide Web
![]() If you
have any questions or comments, you can send E-Mail to Dr. Greg Latta at
glatta@frostburg.edu
If you
have any questions or comments, you can send E-Mail to Dr. Greg Latta at
glatta@frostburg.edu


